Your replacement windows in your home provide plenty of benefits, including better energy efficiency and greater curb appeal. However, like all windows, replacement windows also require regular cleaning to keep them looking their best. Cleaning your windows might seem like a daunting task, but with the right tools and techniques, it can be a simple and efficient process. In this blog post, we’ll share some helpful tips and tricks that will make the task of cleaning your replacement windows a breeze.
Gather the Necessary Cleaning Supplies
Before you begin cleaning your replacement windows, you’ll need to gather the right cleaning supplies. You’ll need a bucket, a squeegee, a scrubber, a microfiber cloth, and a ladder if your windows are located on the upper floors of your home. You will also need a cleaning solution. There are many no-drip, no-streak window cleaning solutions and prepackaged wipes available for purchase at your local stores; however, we suggest an all-natural cleaning solution using a mixture of equal parts white vinegar and hot water. You can also make a solution with dishwasher soap and water. Avoid using power washers or harsh chemicals, as they can damage the window’s finish, break the seals, or scratch the glass coatings.

Begin with a Light Cleaning
The first step to cleaning your replacement windows is to remove any visible debris, such as dust, cobwebs, or dead insects. Using a soft-bristled brush or a microfiber cloth, gently wipe around the window frame, sills, and tracks. If you notice any built-up dirt in the tracks or corners, use a vacuum with a brush attachment to remove it.
Soak and Scrub the Window Glass
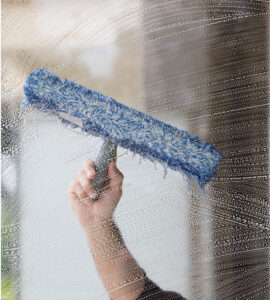
Next, mix your cleaning solution with some warm water in a bucket, following the manufacturer’s instructions. Dip the scrubber into the solution and begin scrubbing the window glass in circular motions, working from the top to the bottom of the window. Be sure to apply enough pressure to remove any stubborn dirt or stains. Rinse the scrubber frequently in your bucket to avoid spreading dirt around.

Squeegee Off the Cleaning Solution

After you’ve scrubbed the entire window, it’s time to squeegee off the cleaning solution. Place the squeegee at the top of the window and pull it down in a straight line, wiping the blade with a microfiber cloth after each stroke. Repeat this process until you’ve squeegeed off all the cleaning solution from the window. Be sure to wipe the edges and corners of the window with a microfiber cloth to remove any excess moisture.
Touch Up Any Remaining Spots
Finally, inspect the window for any remaining spots or streaks. Use a clean microfiber cloth to buff out any remaining moisture or streaks until the window is completely dry and spotless. If you notice any remaining spots or streaks on the window, clean and repeat the process.
Cleaning your replacement windows might seem daunting, but with the correct tools, cleaning products, and techniques, it’s a relatively straightforward task. Using a light cleaning, soaking, and scrubbing the window glass, squeegeeing off the cleaning solution and touching up any remaining spots, and using the right cleaning products such as those designed for use on replacement windows are essential in caring for replacement windows. Keep in mind that cleaning twice a year is essential to ensure that replacement windows remain in top-notch condition. By following the above-discussed guides, you should be able to clean your replacement windows effectively and efficiently while maintaining their quality and longevity.
For more information on caring for your Anlin windows and doors visit our website.
If you are looking for new windows and doors please visit our where to buy section to find a dealer nearest you.


